Creating a Device
Devices can be anything you use to connect to babblevoice with.
Currently this could be:
- A Supported phone,
- a SIP Server,
- some form of CTI through something like our Tapi driver.
Out of the three though, most likely, you will be creating (adding) a phone and so we have put together the following information to help you through this process. If you need assistance at any time then please contact us.
To set up your device (in this instance phone!) then follow the instructions below;
-
Log onto your babblevoice console (www.babblevoice.com)
-
Click on devices, found in the menu bar:

-
In the blue menu bar, click on new:

-
This will bring up the following form:
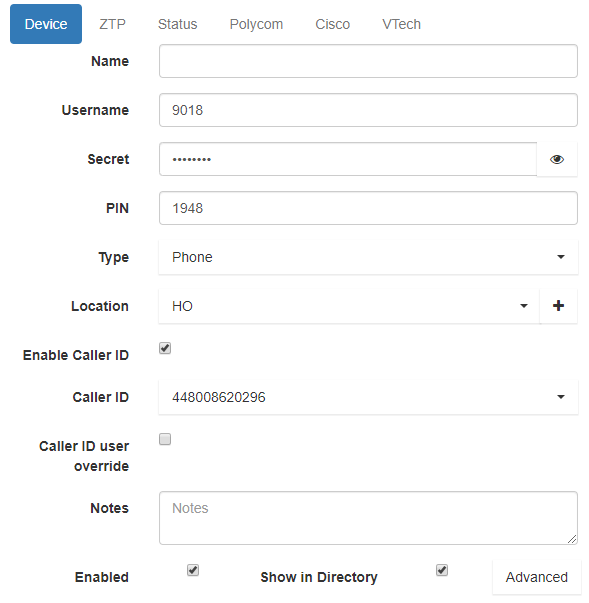
Name: this is where you type in the name of the device (what you are going to call the phone).
Username: this is the extension of the phone and will be inputted automatically. You can change this if you wish.
-
Ensure the location (address) of the phone and the caller ID (the number you are calling from) are correct.
-
Now click 'save and close.'
As there are two different ways your phone network can be set up, you now have to see if VLANS are in use. If you are using VVx201 and your phones are plugged directly into your PCs then you will be using VLANS. If you are using VLANs please follow the directions 'Using VLANS' which you can find by scrolling down this page slightly further.
If you are using VVx101 phones then VLANs will not be present so continue with the steps below.
Now you need to enable ZTP (Zero touch provisioning)
-
Find the phone you have just added which will be in the list in front of you. Click on it and then go to 'edit' which is in the blue menu bar at the top of the screen.
-
This will then open a further box with the following menu bar across the top and click on ZTP:

-
In this tab you need to input the MAC/serial code of the device you are setting up. The MAC address/serial code can be found on the bottom your new pone.
-
Click 'save and close.'
-
Now plug your phone into the network port - it may reboot several times whilst configuring so just be patient whilst it does this!
You should now have a working device/phone!
If you need any advice/support during this process then please contact us.
Using VLANs
If you have identified your network as having VLANs we just need you to identify the VLAN ID. This is done by using a phone that is already connected on your network. On a polycom phone on your network:
- Press the Menu button.
- Scroll to Settings and press Select.
- Select Advanced.
- Enter the admin password (a new unused Polycom phone will be 456, for an existing phone you can get the admin password from the babblevoice console. Go to devices -> select the device -> Edit -> Polycom -> Admin password)
- Select Admin settings.
- Select Network Config.
- Select Ethernet.
- Select VLAN Menu.
This will show you the VLAN ID. Make a note of the number (you will then need to use this number in the same place on the new phone).
Now you need to enable ZTP (Zero Touch Provisioning) which is completed on your PC.
-
Find the phone you have just added, which will be in the list in front of you from step 6 (under devices).Click on it and then go to 'Edit' which is in the blue menu bar at the top of the screen.
-
This will open a further box with the following menu bar across the top and click on ZTP:
-
In this tab you need to input the MAC address/serial code of the device you are setting up. This can be found on the bottom of your new phone.
-
Click save and close.
-
Now plug your phone into the network port - it may reboot several times whilst configuring so just be patient whilst it does this!
-
You will now need to input the VLAN ID that you noted earlier into your new phone using the following steps on your phone:
-
Press the Menu button.
- Scroll to Settings.
- Select Advanced.
- Enter the admin password (a new unused Polycom phone will use the password 456).
- Select Admin settings.
- Select Network Config.
- Select Ethernet.
- Select VLAN Menu and enter here the VLAN ID.
If you need any support/advice during this process please contact us.